
Setting up PSCAD Training Software (Certificate Licensing)
If you will be attending a PSCAD training session, the following are instructions for setting up your software for this:
Step 1 – Obtain Access to the Software and Licensing
1.1 If you do not already have a MyCentre User Account:
a. Register a user account:
https://mycentre.pscad.com
![]() Forgot password or reset issues:
Forgot password or reset issues:
https://www.pscad.com/knowledge-base/topic-332/v-
1.2. If you received a Join Code for linking your MyCentre User Account to the Training Software and Licensing:
a. If not already logged in, log in here:
https://mycentre.pscad.com
b. Paste the Join Code into MyCentre as shown:
.png)
![]() 1.3. Optional - If you want to view your licenses:
1.3. Optional - If you want to view your licenses:
a. If not already logged in, log in here:
https://mycentre.pscad.com
b. Select the workgroup, and view the licenses that you are authorized to use:
.jpg)
1.4 Download the Installer
a. If not already logged in, log in here:
https://mycentre.pscad.com
b. Download the PSCAD installer from the "Downloads" Tab:
.jpg)
Step 2 – Install the Software
a. Extract (unzip) the downloaded files (Step 1.4), save them to a local location (e.g. new folder in Documents or on your Desktop).
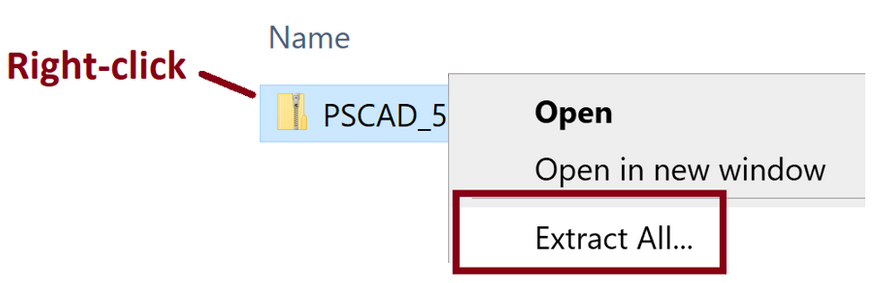
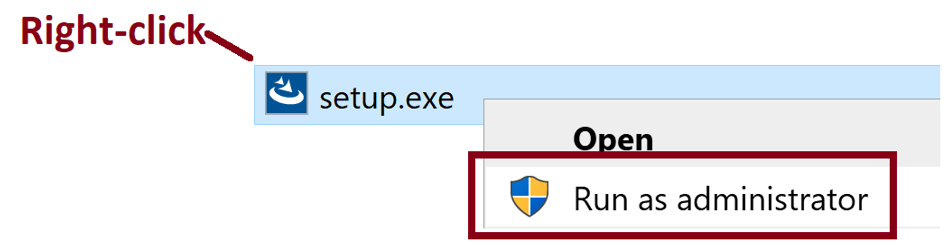
b. From the above unzipped installer files, launch the “setup.exe” file with Windows administrator privileges:
c. Proceed through the installation. Here are some tips during the installation:
(1) These three products are all you will need to select:
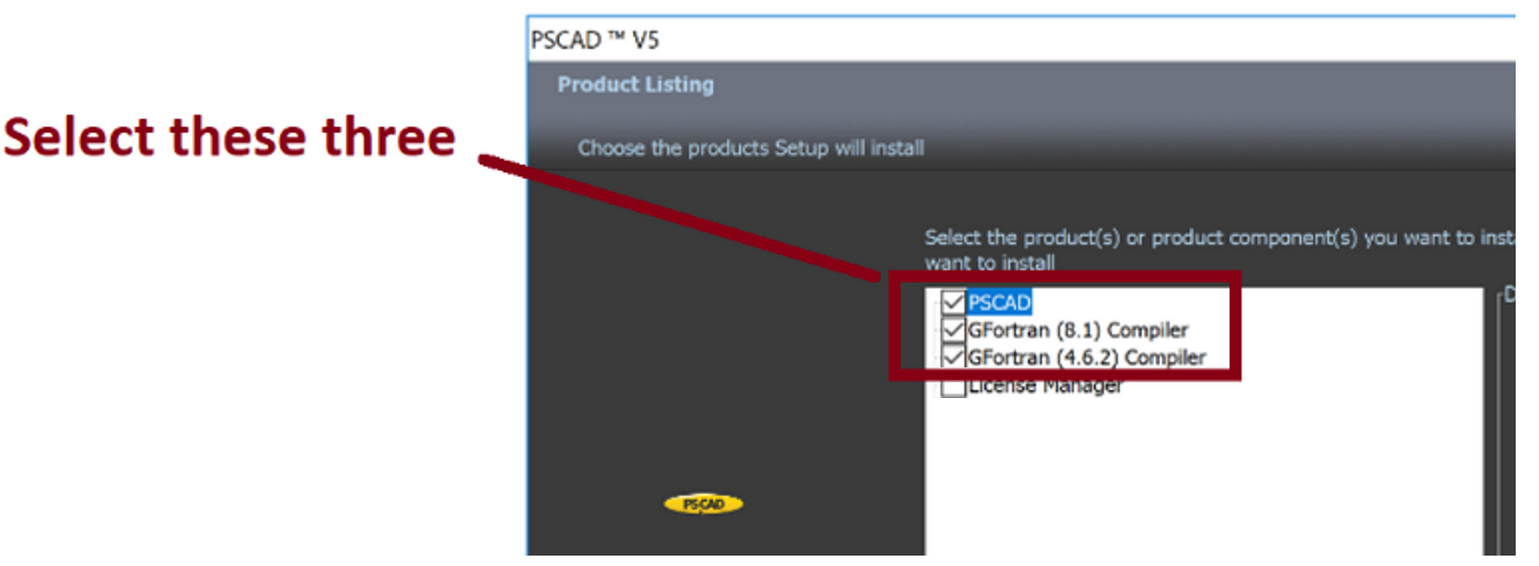
Note - When the GFortran compiler installer launches, ensure to install the software to your C-drive; other drives are not supported.
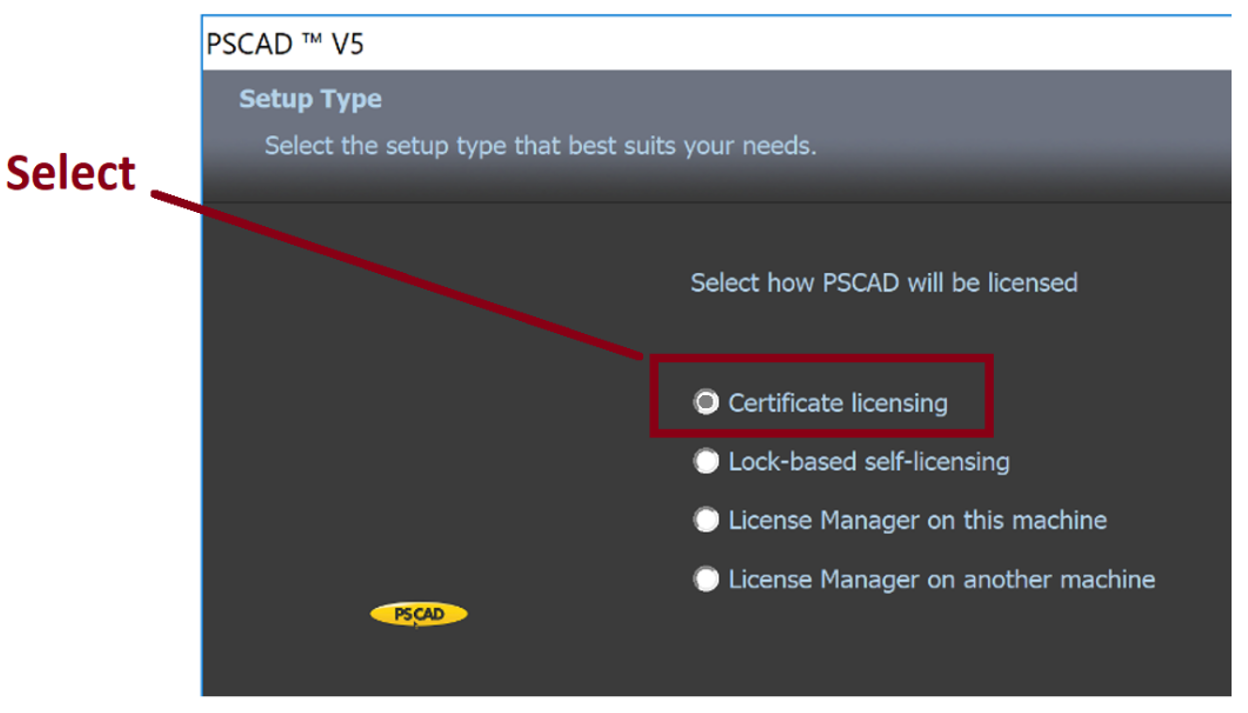
(ii) Select Certificate Licensing:
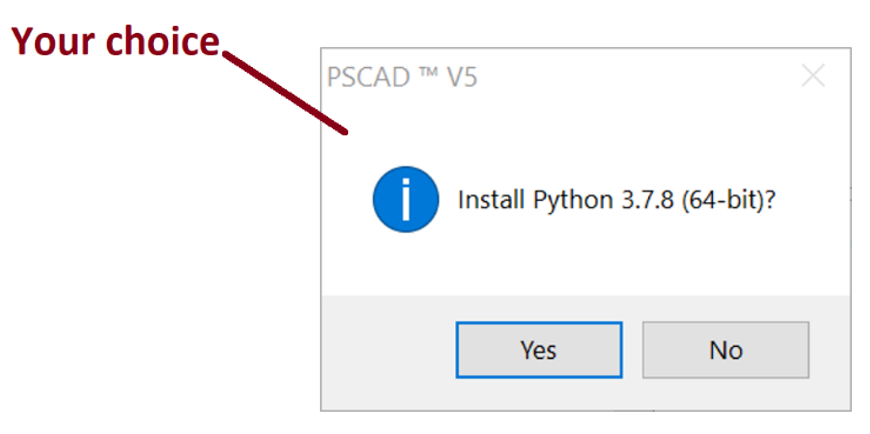
(iii) Optional - Python scripting in PSCAD might not be used in the training session.
But maybe you want to try scripting on your own?
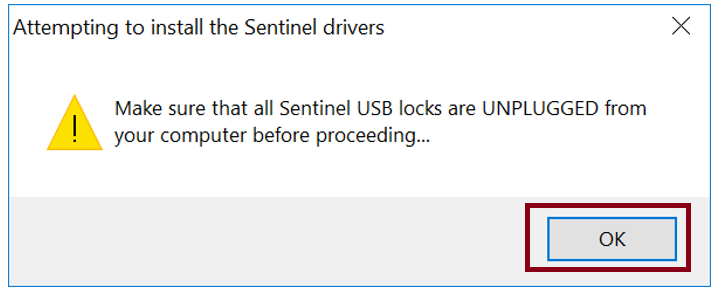
(iv) Select OK, but disregard. This is related to a different type of licensing, lock-based licensing.
(v) Log out then log back in your machine.
Step 3 – Activate a License
3.1 Configure your machine for Certificate Licensing using the Fortran Medic utility:
a. Download the latest Fortran Medic utility from this link, and extract both files:
https://ptcstoragegroup.blob.core.windows.net/utilities/FortranMedic.zip
b. Right-click on the unzipped FortranMedic.exe file, and select “Run as administrator”.
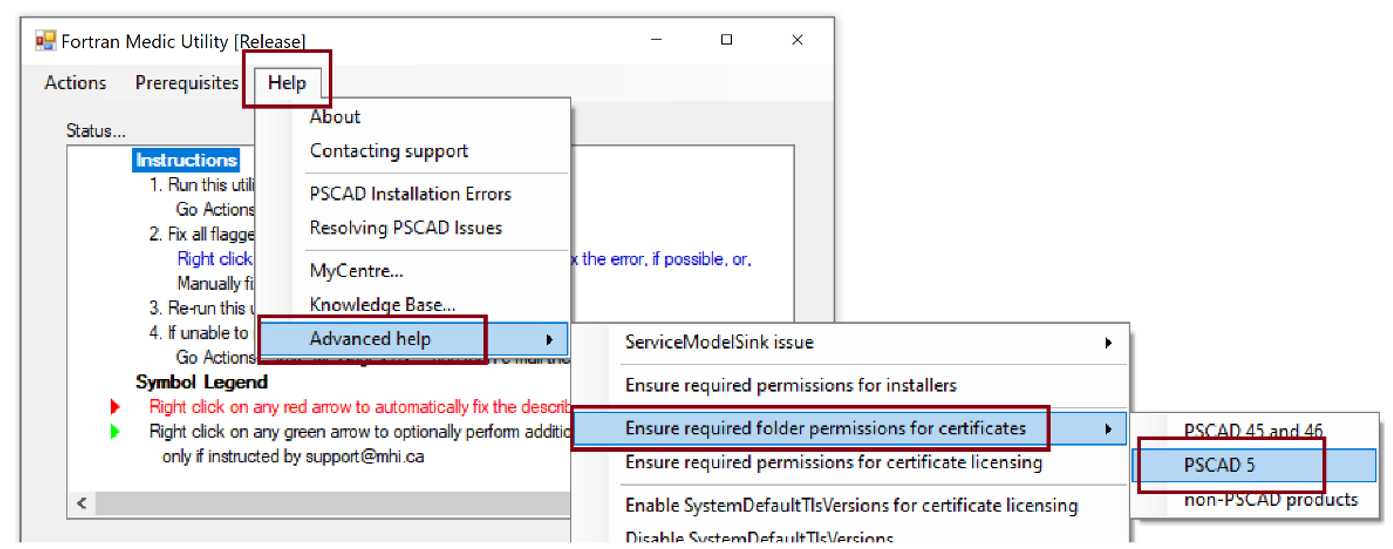
c. Configure folder permissions:
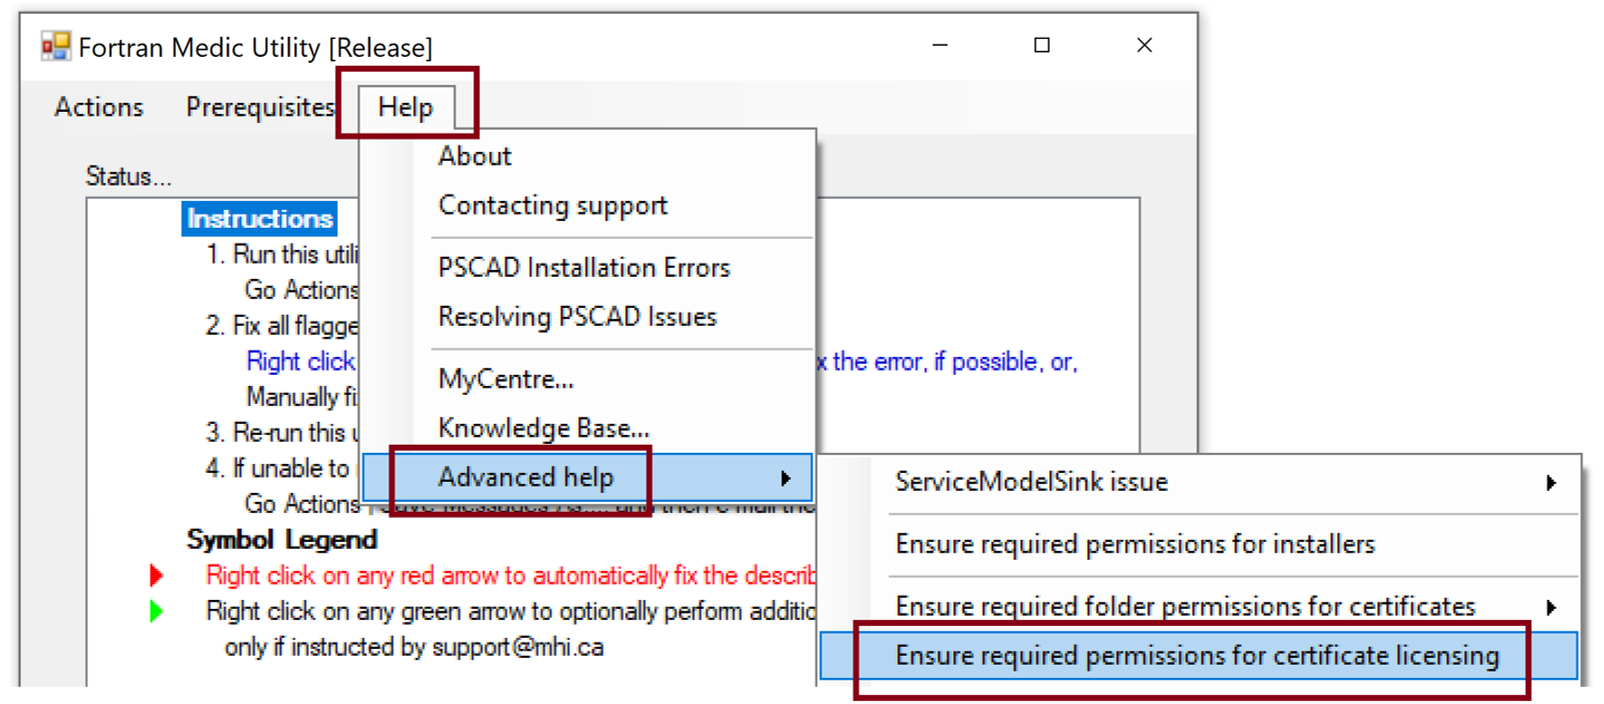
d. Configure file permissions:
e. Enable TLS 1.2:
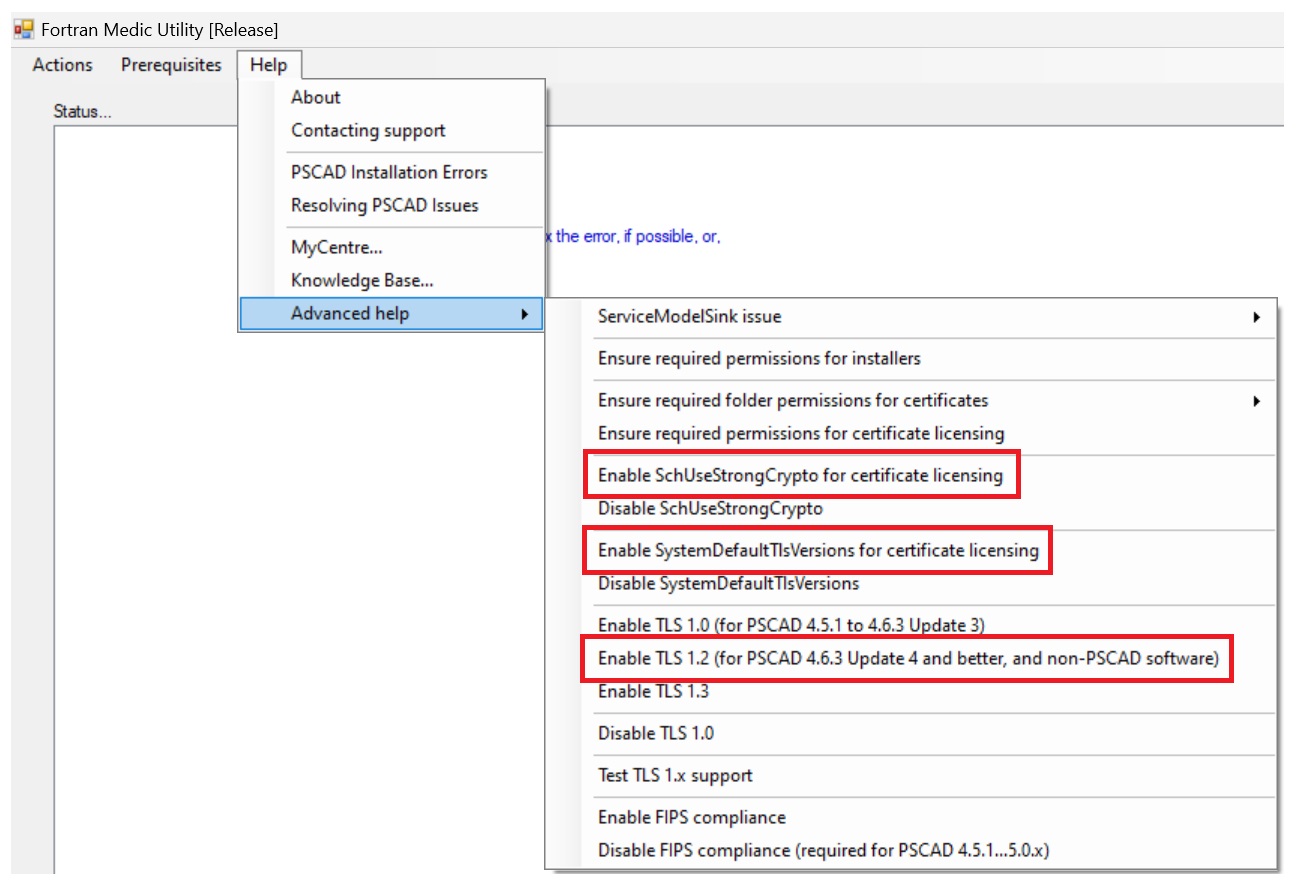
Note - Further details about configuring permissions are available in this article:
https://www.pscad.com/knowledge-base/article/777
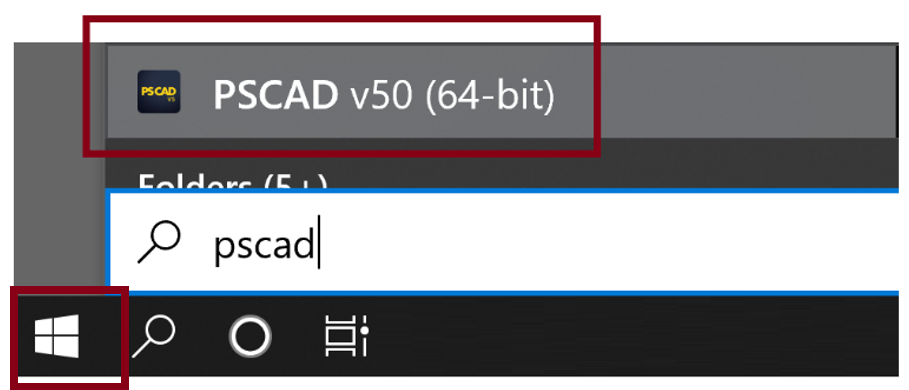
3.2 Launch PSCAD:
a. Launch “PSCAD v50” from the Windows Start menu:
3.3 Configure PSCAD for Certificate Licensing:
a. If “Switch to Certificate” is presented in this menu, click on it, and PSCAD will be configured for certificate licensing:
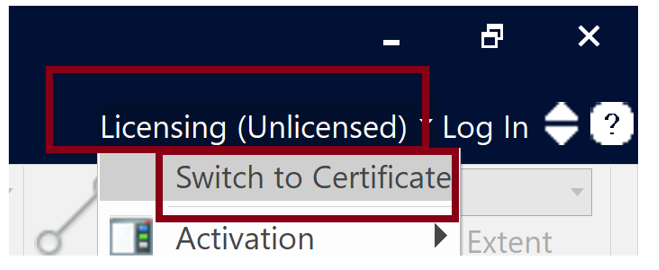
![]() If the wording in the above view is “Switch to Lock-based”, make no change! (PSCAD is already configured for certificate licensing!)
If the wording in the above view is “Switch to Lock-based”, make no change! (PSCAD is already configured for certificate licensing!)
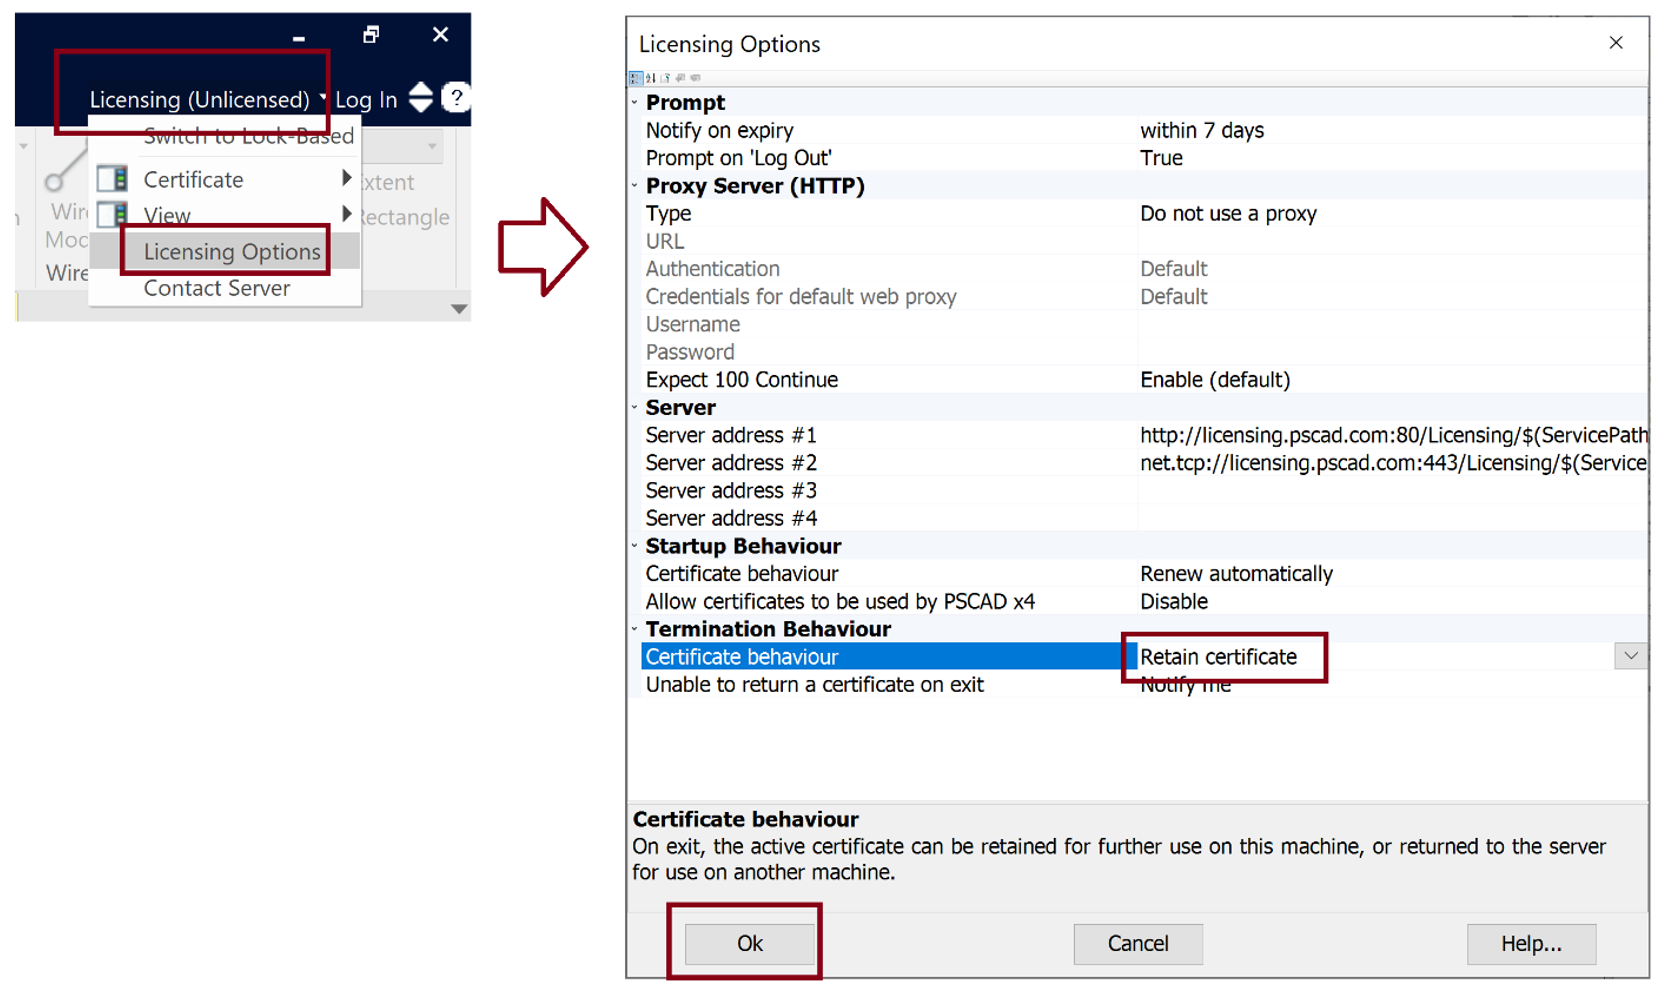
3.4 Configure PSCAD to Retain the Certificate:
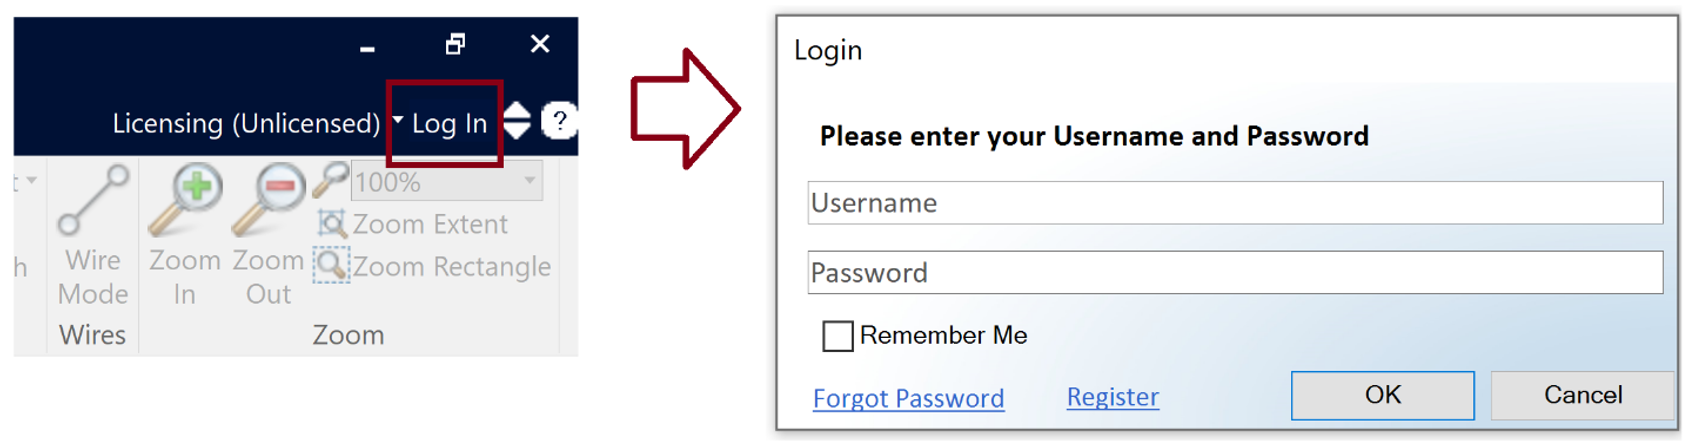
3.5 Log In:
a. Enter your MyCentre login credentials:
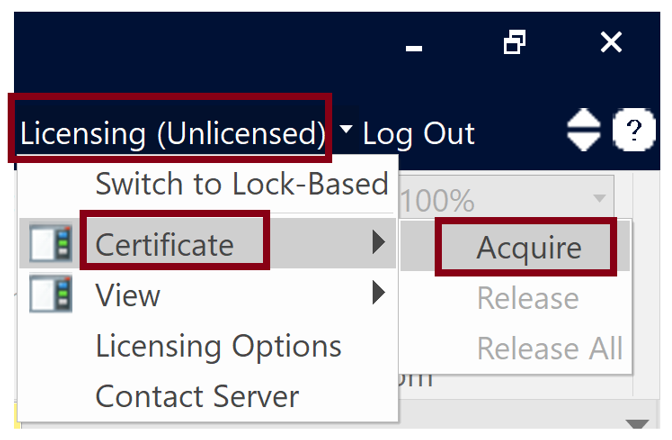
3.6 Activate the License:
Step 4 – Test your Compiling Setup
Refer to this article for instructions for testing your compiler setup:
https://www.pscad.com/knowledge-base/article/566
Step 5 - Resources
Resources for using PSCAD may be displayed from this page:
https://www.pscad.com/knowledge-base/topic-243/v-
Step 6 - Support