Changing Table Field Properties
Table fields are specially designed to allow the user to enter data in vector or matrix form directly as a component parameter. Table fields include the following numerical sub-types:
Real
Integer
NOTE: Table fields can currently be used only in standard, non-module components.
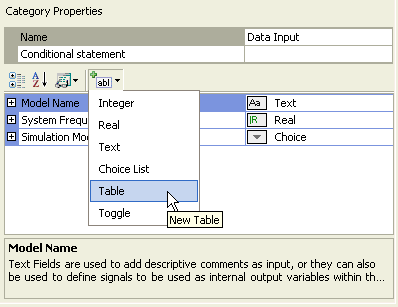
To add a new table field to a category page, select the category in the Categories tree and then select Table within the Add Parameter Field drop list button:
A new table field will appear:
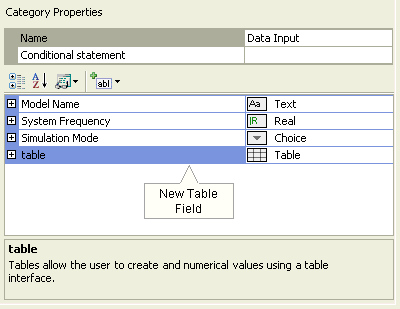
Table field properties can be adjusted directly on the category page. Left-click on the [+] box to expand the table field tree node.

The properties available are described as follows:
Description: Enter a caption to act as the visible title of the table field.
Symbol: Enter a symbolic name for the table field, which will be used as a variable name when addressing this field within code. Note that this name must be compatible with standard Fortran naming conventions (i.e. it must begin with a non-numeric character, do not include spaces, etc.).
Group Label: Use this field to organize the display of the input parameters in the actual component parameter dialog. All parameter fields that possess the same group name will be grouped together under the group name heading.
Prompt Text: Enter a brief statement describing the field. This text will be displayed on the actual input parameter dialog for the component.
Help Mode: Select Append or Overwrite. If Overwrite is selected, only the help text will appear at the bottom of the dialog when the user selects this parameter. If Append is selected, then the prompt text will be appended to the other parameter attribute information displayed.
Conditional Expression: Enter a conditional statement to indicate under what input conditions the table field is to be enabled. See Conditional Statements, Layers & Filters for more details.
Data Type: Select Real or Integer.
Decimal Places: Enter the precision of the input data values to a maximum of 6 decimal places. If the values are of arbitrary precision, select -1.
Edit Columns: Define the columns for the vector or matrix. This will invoke the Column Editor dialog, which functions in the same manner as the Drop List Editor described in the Choice Lists section above.
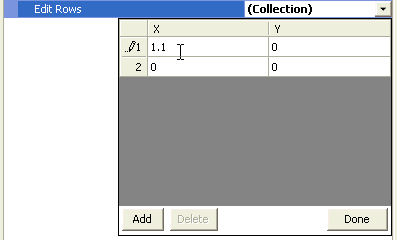
Edit Rows: Define the rows for the vector or matrix. This is also where you can enter the default value of each matrix element. To add a row, press the Add button. Default values may be entered directly in each element field.