Changing Choice List Properties
Adding Choices to a Choice List
Ordering Choices in a Choice List
The purpose of a choice list is to allow the user to set conditions according to a selected choice, which will possess an associated integer number for use internally in conditional statements.
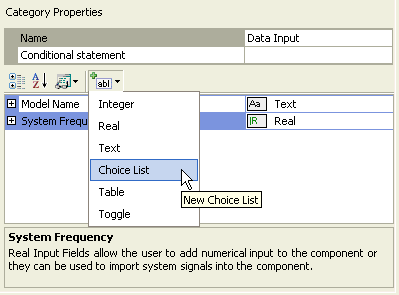
To add a new choice to a category page, select the category in the Categories tree and then select Choice within the Add Parameter Field drop list button in the tool bar:
A new input field will appear:
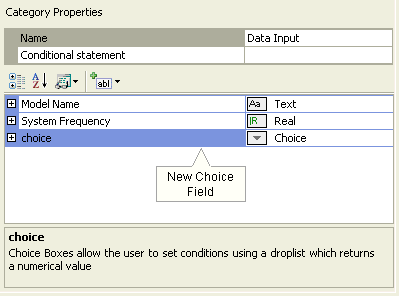
Choice list properties can be adjusted directly on the category page. Left-click on the [+] box to expand the choice list tree node.
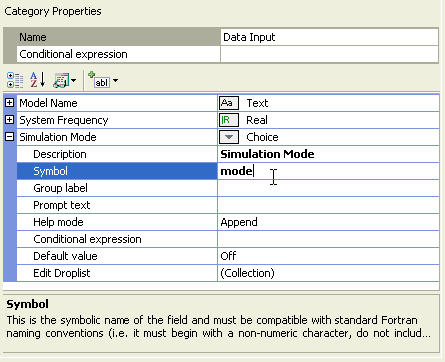
The properties available are described as follows:
Description: Enter a caption to act as the visible title of the choice list field.
Symbol: Enter a symbolic name for the choice list, which will be used as a variable name when addressing this field within code. Note that this name must be compatible with standard Fortran naming conventions (i.e. it must begin with a non-numeric character, do not include spaces, etc.).
Group Label: Use this field to organize the display of the input parameters in the actual component parameter dialog. All parameter fields that possess the same group name will be grouped together under the group name heading.
Prompt Text: Enter a brief statement describing the field. This text will be displayed on the actual input parameter dialog for the component.
Help Mode: Select Append or Overwrite. If Overwrite is selected, only the help text will appear at the bottom of the dialog when the user selects this parameter. If Append is selected, then the prompt text will be appended to the other parameter attribute information displayed.
Conditional Expression: Enter a conditional statement to indicate under what input conditions the choice list is to be enabled. See Conditional Statements, Layers & Filters for more details.
Default Value: Use this field to add an integer (ex. 0, 1, 2, etc.), which will correspond to the default choice from the list.
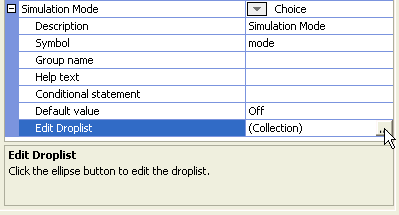
Edit Drop List: This field is used to invoke the Drop List Editor. This editor is used to construct the actual list of choices. See the following section for details.
Choice lists are constructed using the Drop List Editor. To open the editor, left-click on the [+] box to expand the choice list tree node, select the Choice List field and then left-click the [...] button.
The Drop List Editor will appear. To add choices to the list, click the Add button.
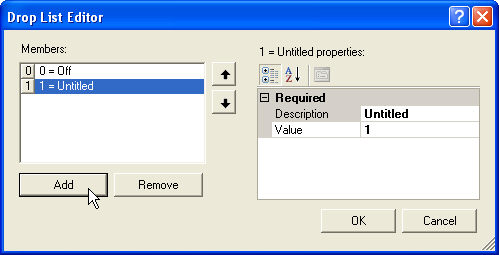
The contents of any choice in the list can be modified in the editor window to the right: Within the Members list, left-click on the choice name to select it. To edit the properties of the selected choice, left-click either the Description and/or the Value field.
Note that when adding choices to the choice box, the most important thing to remember is that a unique integer must be assigned to each entry in the Members choice list. This is accomplished by modifying the Value field as described above. It is this assigned number that will be associated with the Symbol name of this choice list.
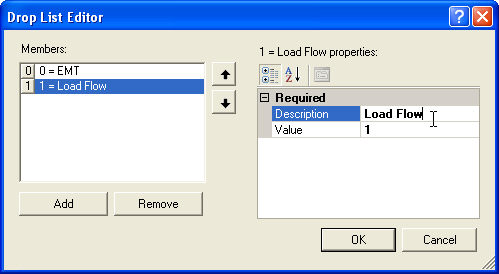
To delete a choice in the choice list, left-click on a choice within the Members list to select it. Click the Remove button.
Once multiple choices exist in a list, they may be re-ordered as follows: Select the desired choice from the Members list. Click the up or down arrows to move it up and down the list.