The Scenarios feature (formerly known as Control Templates) provides users with the ability to save unique sets of dynamic control settings (i.e. Dial, Switch and Slider components) into scenario templates. In a sense, saving a scenario is similar to taking a snapshot of all dynamic control settings in a project, which may thereafter be referenced at any time.
Scenarios are saved as part of the project file, so when a project with scenarios is loaded, any saved set of settings can be immediately reinstated by selecting the desired scenario. It is possible to store multiple scenarios so that the user can easily switch between them, without having to manually reset all the control components. In fact, scenarios can be changed during a simulation!
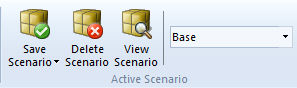
Scenarios can be accessed via the Home tab of the ribbon control bar.
Before saving your dynamic control settings as a scenario, first ensure that all Dial, Switch and Slider control components have been set, and that the current project is the active project. Press the Scenarios button to bring up the scenarios pop-up menu as shown below:
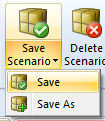
Select either Save or Save As depending on what you want to do. If this is the first scenario created for this project, select the latter.
NOTE: You may store all settings to the default scenario if you wish. Simply ensure that Default appears in the control setting window and select Save. Also, ensure that all controls possess a distinct name; otherwise an error message will be posted.
If creating a new scenario (i.e. Save As), a dialog window will pop-up – enter a name for the scenario.
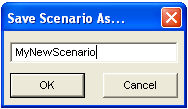
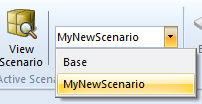
When finished, press the OK button. Your dynamic control settings will now be stored in this new scenario. Whenever you want to revert back to this scenario, simply left-click the down arrow on the scenario drop list and select it.
You can delete any scenario by first making the scenario to be deleted the active scenario. Then select the Delete Scenario button in the Home tab of the ribbon control bar:
![]()
The application provides a scenario viewer so that the dynamic control settings in each scenario can be easily viewed and verified. To bring-up the scenario viewer, select the View Scenario button in the Home tab of the ribbon control bar:
![]()
The scenario viewer window contains a few simple features to help view and organize scenario data. The viewer consists of two sections: A scenarios tree on the left, which displays all scenarios saved in the project and a data sheet view to the right. The data sheet view lists the settings (specific to whatever scenario is selected in the scenario tree) of all control interfaces in the project.
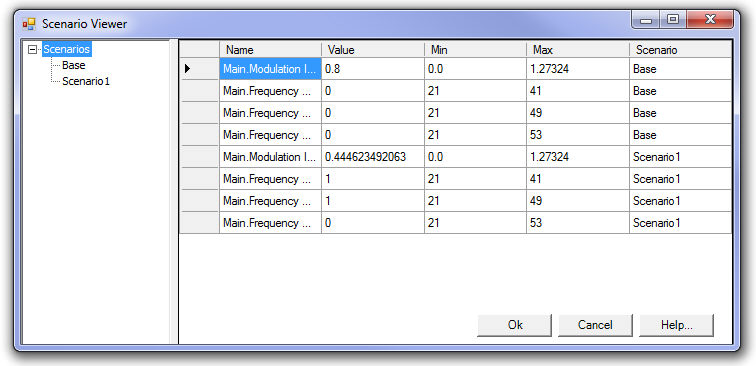
To view the settings pertaining to a single scenario, simply select that scenario on the scenario tree.
Values in the Value, Min and Max columns may be modified and saved directly from the Scenario Viewer. Simply double-click on the field and enter a number.
