
Utilising the Generated C Program
Modifying the Auto-Generated Code for Dynamic Allocation
Supported Master Library Components
Preparing a Module for the C-Coder
Custom Components and the C-Coder
The C-Coder enables you to translate a purely control-based page module into a fully formed, ANSI-standard, C-language program. This code can then be compiled and executed outside of PSCAD, including on embedded hardware such as micro-controllers.
C-language program generation is accomplished by constructing a control circuit using a collection of our more basic master library components, specifically from the Control System Modelling Functions (CSMF) section, but miscellaneous other components are also supported (see Supported Components). Once constructed inside of an encapsulating page module, including input and output signals as required, the C-language program is generated with a single click.
To facilitate this functionality, a component definition script segment, called ‘C’ is utilised, where we have placed C-code script that is functionally equivalent to the component’s original Fortran-based script. The ‘C’ component script segment is only ever considered when generating a C-language program.
To run the C-Coder, and thereby converting the contents of a module to a C-language program, simply right-click on the prepared module and select Generate | Independent C-Code.
A dialog is presented allowing the configuration of data types for integers, floating-point values, and complex numbers. These settings ensure the generated code matches the capabilities of your target compiler and/or hardware.
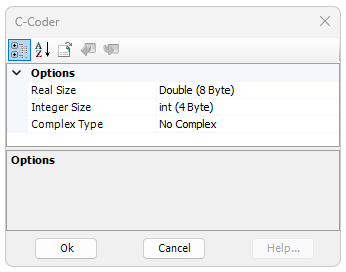
Options are:
PSCAD uses a 64-bit integer (Double) by default.
Options are:
PSCAD uses a 32-bit integer (Int) by default.
Options are:
As many C compilers do not support complex numbers, a No Complex option is given. The C99 Standard Complex type is also supported for any compiler that fully supports C99 complex types. Some compilers, like the Microsoft Visual C Compiler, supports complex types using a structure instead of an inherent type.
Once the data types are selected, you can hit the OK button to generate your independent C program.
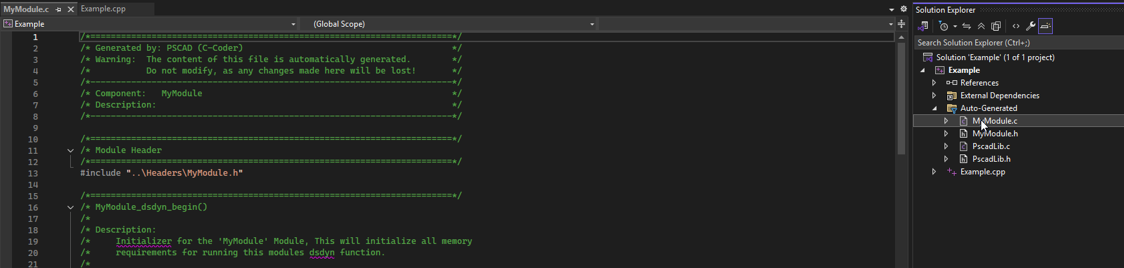
The C program files are organized and placed by the C-Coder in the project temporary build folder:
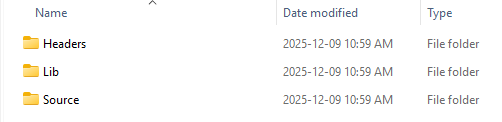
This folder contains the auto-generated header files for calling the module code. There may be one or more files in this directory. One file for each module that was compiled for C-Code, including sub modules of the original module. The name of each header file matches the name of the source module definition.
Contains two key files:
These files contain the source code for all supported master library components. They contain all of the function versions necessary for all potential data type combinations that can be set in the C-Coder launch dialog. The source code provided here allows modification or removal of unneeded code for use with different compilers.
This folder contains the implementation for each module in C-language. There may be one or more files in this directory. One file for each module that was compiled for C-Code, including sub modules of the original module. The name of each source file will match the name of the module definition source of the code.
Now that the source code for the module is generated, we can proceed to using it.
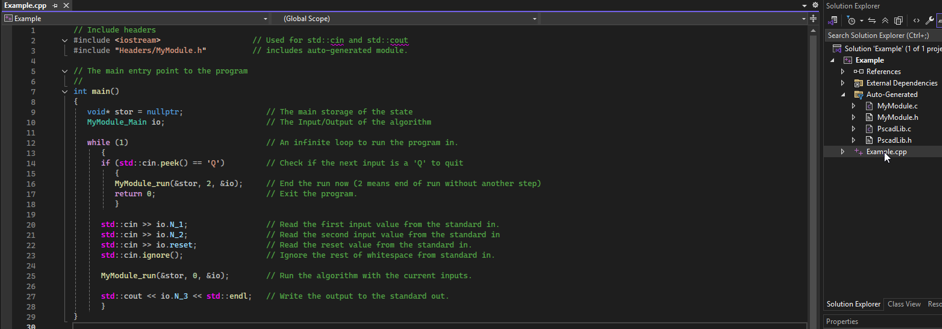
For the purposes of this topic, Microsoft Visual Studio 2022 is used to compile the generated files into a program that gets the input from the standard in, and pushes the output to the standard out.


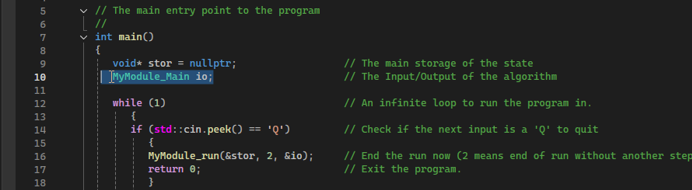
Despite this being a pointer all memory by default is statically allocated for use in hardware that does not allow for dynamic allocation of memory. The pointer will be assigned internally to the statically allocated structure where all memory for the algorithm is defined the first time the auto-generated code is called.

In this example the IO is simply read from standard in using the cin command provided by the C++ standard library.
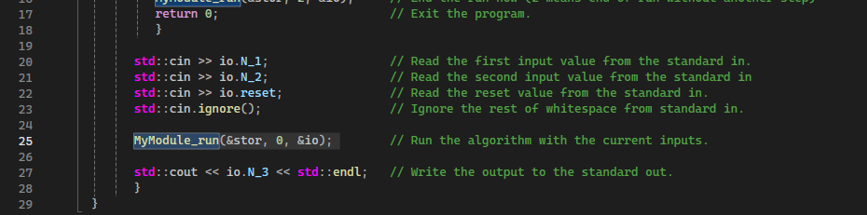
This function will take in a pointer to the void pointer for storing the application memory. An integer indicating the type of run and a pointer to the IO structure for the algorithm.
The integer can be one of 3 values: 0 indicates that it is a standard run, 1 indicates that this is the last timestep, complete the timestep and clear the memory, and 2 indicates that the last timestep already occurred and just clear the memory without running the timestep.
In this case we do not know the end timestep before running it, so only 0 and 2 are used. If the void pointer is null, then this algorithm will assign it to the statically allocated application storage and initialise all the values for the run. Afterward it will run the first timestep. By default, this algorithm will be running in real time, querying the system clock for the time on each call.
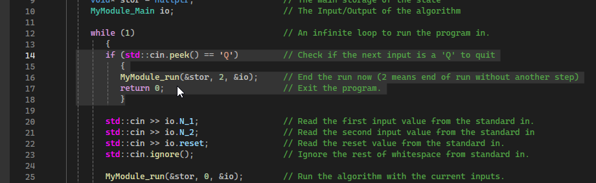
An extra call should be made to the run function to ensure all resources are cleaned up properly. This is done by either passing a 1 or a 2 into the run function for the type of run parameter. In this case, a 2 is used to indicate that another timestep should not be run, and the application is complete. If a 1 is provided, an additional timestep using the current IO would be completed before the cleanup occurs.
There are circumstances in which dynamic allocation is preferred over static allocation. This can include any time multiple instances of this code would be needed in a single application. Or if the hardware supports dynamic allocation but has limits on static allocation. In this case, a simple modification to the auto-generated source code can be made to support dynamic allocation.
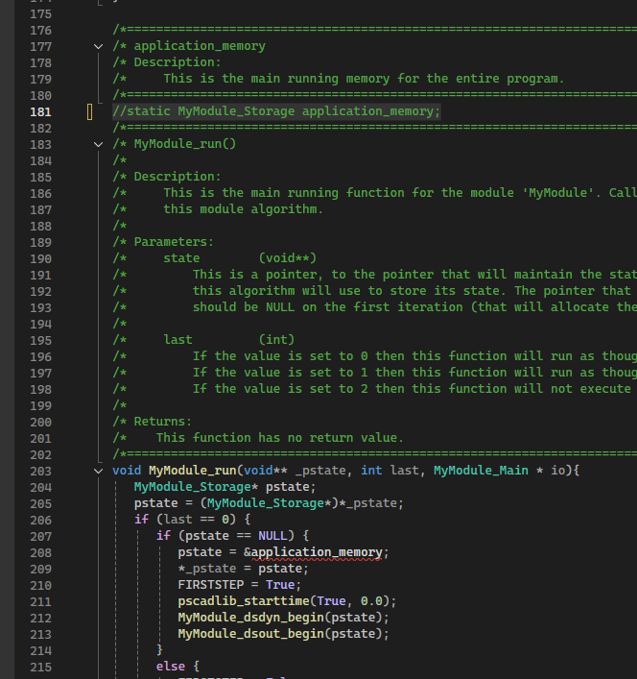
To support dynamic allocation simply navigate to the run function. Directly above that function will be a statically allocated structure titled “application-underscore-memory” This line of code can be removed.
Then in the two places using the application memory in the module run, can be replaced with a call to malloc providing the size of the structure.

Then add a free to the pstate variable in the two places where it is set to null, before it is set to null.
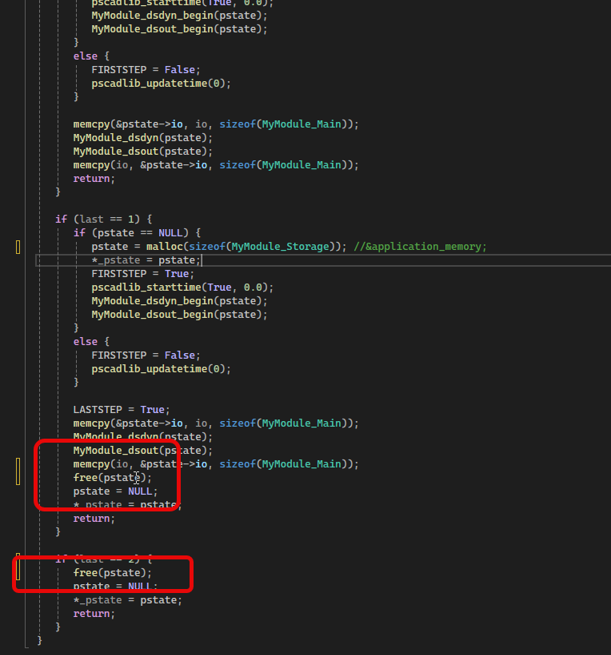
With those minor changes to the auto-generated code the module code is now using dynamic memory, instead of static memory and will allow multiple instances of the code to exist at the same time in the application if required.
The C-Coder supports purely control-based components only (non-electrical) where the mathematical behaviour of the component is not proprietary. As such, supported master library components are mainly fundamental in nature:

CSMF
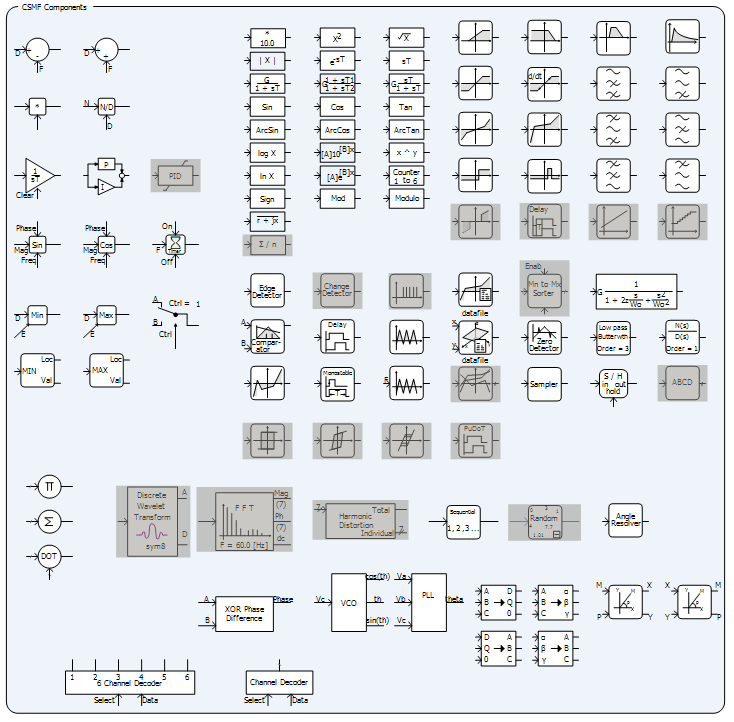
NOTE: Unsupported CSMF components are marked above as disabled.
To determine directly if a component is supported for use with the C-Coder, edit the definition of the component, and check for the existence of a 'C' script segment.
Preparation is best described with an example.
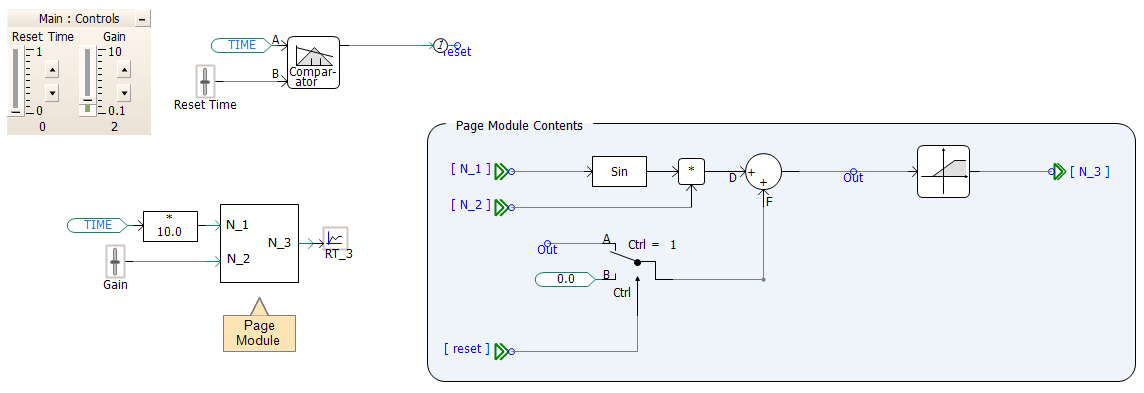
In this scenario, a simple page module is created with three inputs and one output. The module computes a time-ramped value based on the Sine of input N_1, multiplied by input N_2, and then added to a stored, previous value Out. The Out signal can be reset to 0.0 at any time, via a page module parameter input signal reset.
External inputs to the simulation are set using time-based signals and sliders:
Note that all components within the module are supported master library components, and no electrical components or nodes exist.
Prior to launching the C-Coder, you should build and run the simulation using EMTDC, analysing and reviewing the simulation results. When confident that the results are accurate and the simulation performs as expected, the C-Coder may be launched.
Custom component models may be programmed to be supported by the C-Coder. This involves the following steps:
See C segment and Creating a New Component, Module or Transmission Wire for more details on this.